
Spooky Chic: Halloween Nails That Will Haunt Your Feed 💅💀
Spooky Chic: Halloween Nails That Will Haunt Your Feed 💅💀
Halloween is just around the corner, and it's time to get spooky! But it's not just about the costumes and the candy - your nails are an essential part of your Halloween look. This year, let's ditch the predictable black and orange and embrace some truly haunting nail art that will have everyone asking, "Where did you get those nails?!"
From ghoulishly glamorous to playfully spooky, there's a Halloween nail design out there for everyone. We've got you covered with inspiration and tips to make your nails the star of your Halloween night.
The Classics With A Twist: Black & Orange Gets A Makeover
Black and orange are classic Halloween colors, but that doesn't mean you have to stick to basic manicures. Think outside the box with ombre effects, geometric patterns, and negative space designs.
-
Ombre Magic: Start with a gradient from black to orange, or even a more dramatic black to white. You can even add a touch of metallic gold or silver for an extra touch of spookiness.
-
Geometric Ghouls: Sharp lines and angles add a modern edge to your Halloween nails. Think black triangles on an orange base, or orange squares against a black backdrop. You can also experiment with contrasting glitter or metallic accents.
-
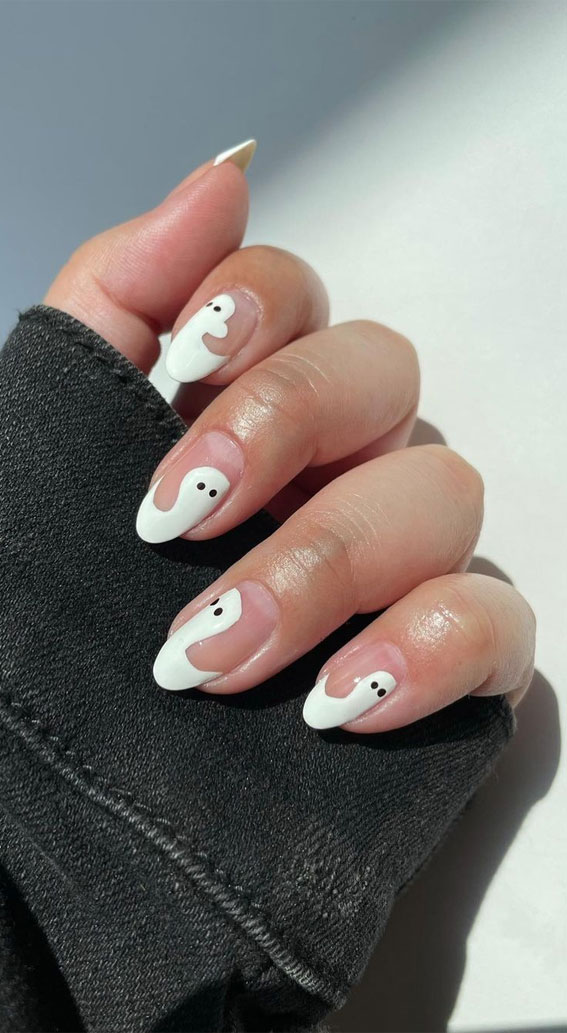
Negative Space Spookiness: This trend is all about leaving areas of the nail bare. Create spooky silhouettes like a ghost, a bat, or a spider with negative space. It's simple yet eye-catching.
Pro Tip: Don't be afraid to use stencils or nail art tools to create intricate designs. You can even find ready-made nail art decals for easy application.
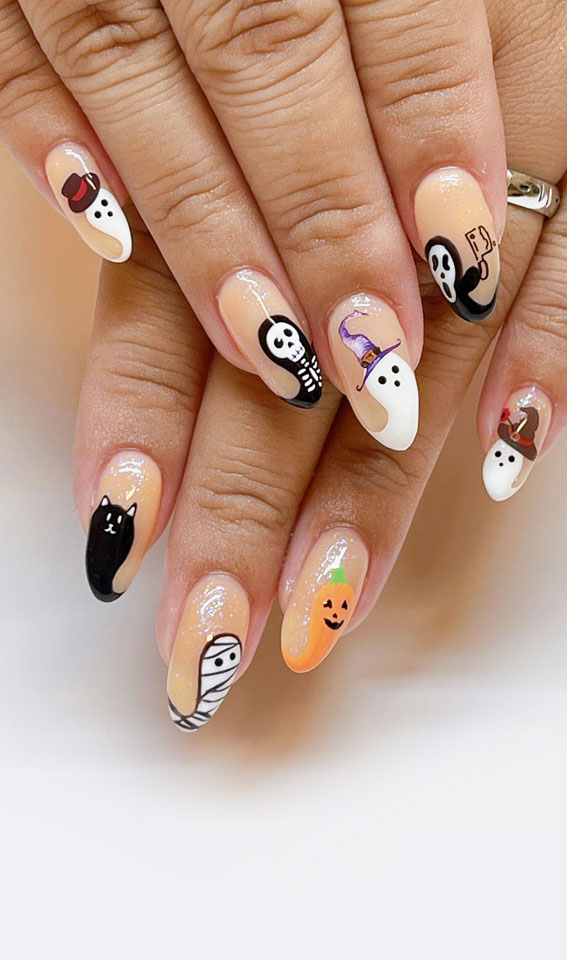
Spooky Cute: Embrace The Fun Side Of Halloween
Not everyone wants to go full-on scary with their Halloween nails. If you prefer a more playful approach, there are plenty of cute and quirky designs to choose from.
-
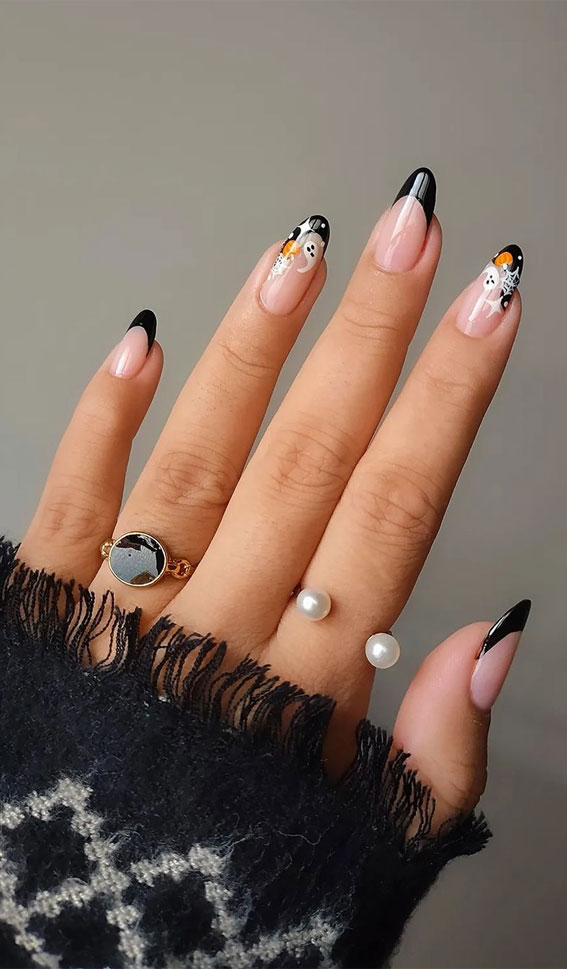
Ghostly Gals: Cute ghost faces on a white background are a classic Halloween nail design. You can add eyes, mouths, and even little hats for a whimsical touch.
-
Batty Fun: Bats are another adorable Halloween icon. Paint them in black on a bright background like orange, purple, or green. You can even create a bat wing effect with a black and white ombre.
-
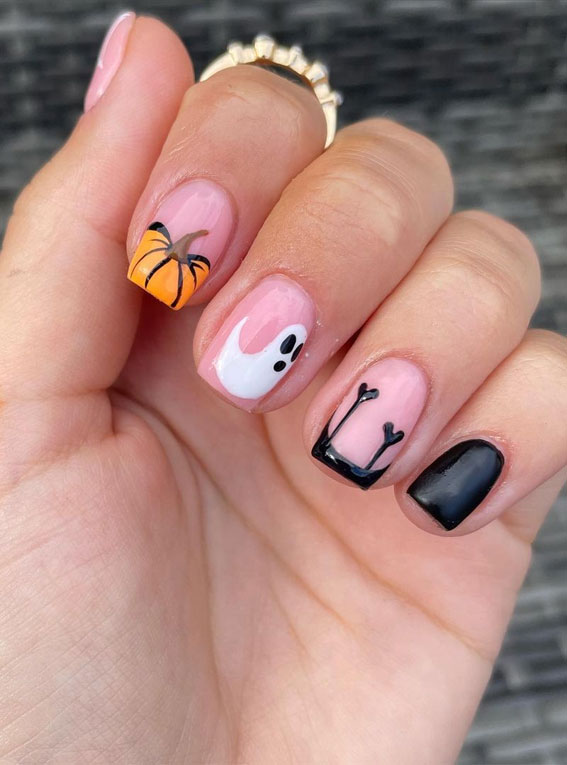
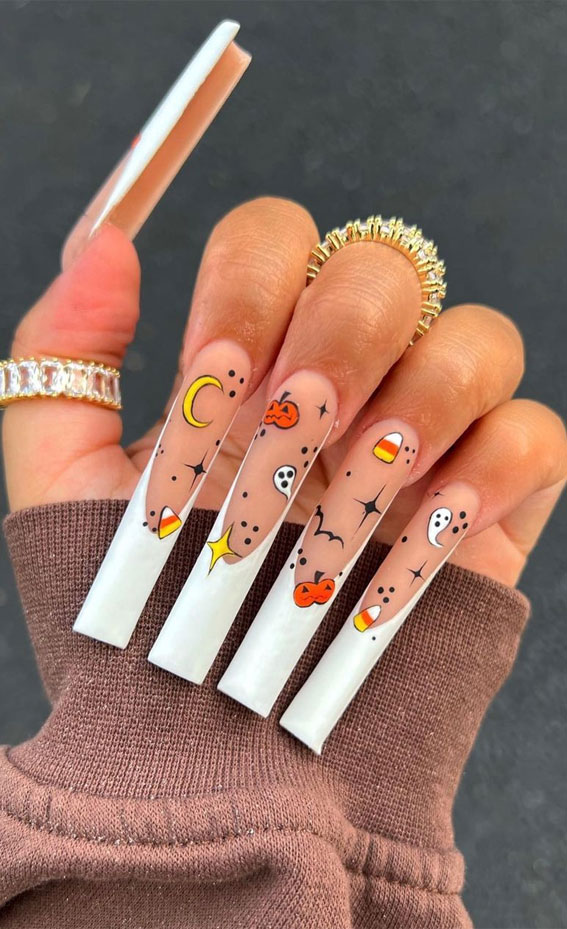
Pumpkin Patches: Get creative with your pumpkin designs! Go for a classic jack-o'-lantern face, or try a more abstract interpretation. You can even add fun details like glitter, polka dots, or even tiny pumpkins.
Pro Tip: Don't be afraid to experiment with different colors and textures. Use glitter polish, matte top coat, or even textured nail art to add dimension and interest.
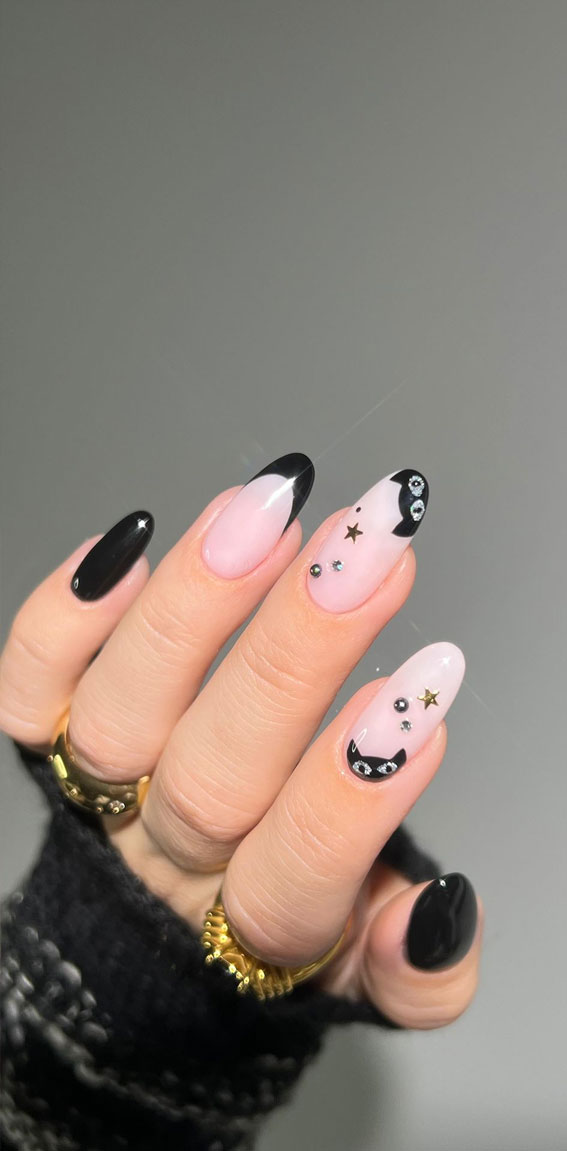
Hauntingly Glam: For The Fashion Forward
Halloween doesn't have to be all about kitsch and cuteness. If you're looking for a sophisticated and glamorous Halloween look, there are several ways to elevate your nail art.
-
Metallic Magic: Metallic gold, silver, or even black polish is perfect for a luxurious and mysterious Halloween look. Pair them with simple designs like stripes, dots, or even a single accent nail.
-
Vampy Vibes: Deep red and burgundy shades exude a seductive and powerful vibe. Try a deep red with black glitter, or a burgundy with a subtle glitter gradient.
- Crystal Craze: Add some sparkle with crystals or rhinestones. Create a celestial design with a dark blue base and scattered stars, or add a few crystals to a simple black manicure for a touch of glam.
Pro Tip: For a truly glamorous look, choose a professional salon for your nail art. They have the expertise and supplies to create stunning designs.
Get Creative: Embrace Your Unique Style
Halloween is a time to embrace your individuality and have fun! Don't be afraid to experiment with different colors, textures, and designs. Here are a few ideas to get your creative juices flowing:
-
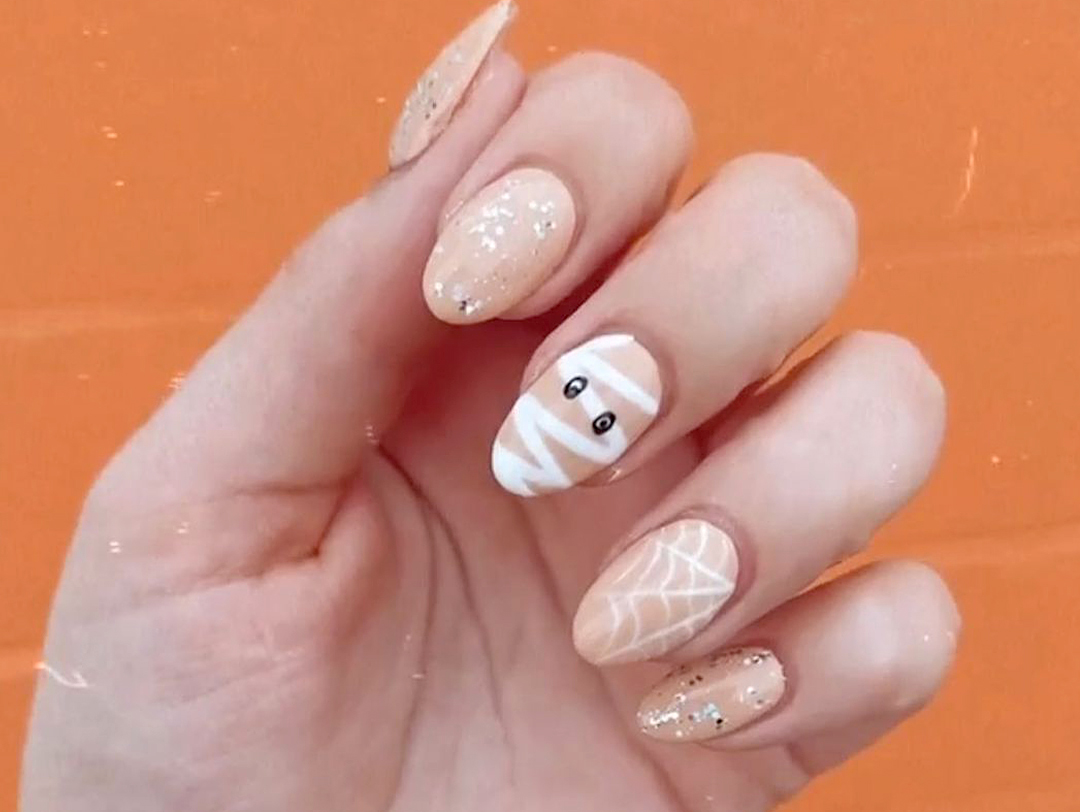
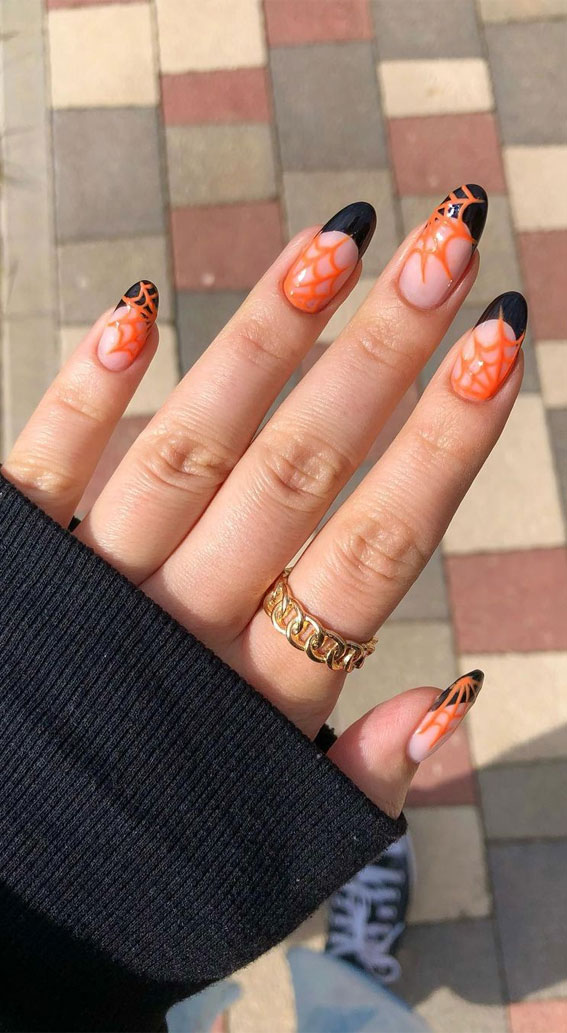
Cobwebs and Spiders: Cobwebs are a classic Halloween motif. Create a realistic cobweb design with white or black polish, or add a scary spider for an extra touch.
-
Graveyard Chic: Paint tiny tombstones on your nails with a white base and black accents. You can even add a spooky inscription or a cute ghost.
- Halloween Characters: If you're feeling ambitious, paint your favorite Halloween characters on your nails. Think witches, vampires, Frankenstein, or even a creepy clown!
Pro Tip: Use a fine-tipped nail art brush for precise detailing. You can also find pre-made nail art stamps for easy designs.
DIY vs. Pro: Finding Your Perfect Halloween Nails
Are you a DIY queen or a salon enthusiast? Here's a breakdown of the pros and cons of both options to help you decide which path to take:
DIY Advantages:
- Cost-Effective: Doing your own nails saves you money, especially if you already have some basic supplies.
- Customization: You have complete creative control and can personalize your design to match your exact vision.
- Relaxing and Fun: Many people find nail art to be a relaxing and enjoyable hobby.

DIY Disadvantages:
- Time Commitment: It takes time and practice to achieve complex nail art designs.
- Limited Supplies: You may not have access to all the tools and supplies you need, especially for intricate designs.
- Potential for Messes: Nail polish can be messy, and it takes practice to achieve clean and precise results.
Salon Advantages:
- Professional Results: You can rely on trained technicians to create stunning designs.
- Wider Range of Options: Salons offer a wider variety of nail art supplies, including advanced techniques and tools.
- No Mess: Leave the clean-up to the professionals!
Salon Disadvantages:
- Cost: Salons can be expensive, especially for elaborate designs.
- Limited Customization: You may not be able to fully customize your design, depending on the salon's offerings.
- Scheduling: You may need to book an appointment in advance, especially during busy periods like Halloween.
No matter which route you choose, remember to have fun and be creative with your Halloween nails!
Tips For Perfect Halloween Nails
Here are some extra tips to help you achieve a flawless Halloween manicure:
- Prep Your Nails: Start with clean and dry nails. File them into your desired shape and apply a base coat for protection and better adhesion.
- Choose the Right Polish: Select high-quality polishes that are formulated for long-lasting wear. Don't be afraid to experiment with different finishes like matte, shimmer, or glitter.
- Apply Thin Coats: Apply thin coats of polish to prevent smudging and allow each coat to dry completely before adding the next.
- Use a Top Coat: A top coat helps seal in the polish, prevent chips, and add shine. You can also use a matte top coat for a more modern look.
- Be Patient: Nail art takes time and practice. Don't be discouraged if your first attempts aren't perfect. Keep practicing and you'll soon become a pro!
Don't Forget The Finishing Touches
Your Halloween nails are a statement piece, but don't forget the rest of your look! Here are some ideas for completing your spooky chic ensemble:
-
Matching Makeup: Pair your nails with a Halloween-inspired makeup look. Think smoky eyes, bold lips, or even a creative face paint design.
-
Costume Coordination: Choose nail art that complements your costume. If you're dressing as a witch, go for black, purple, or green nails with a spooky design.
-
Halloween Accessories: Add a spooky touch with accessories like Halloween-themed jewelry, hair clips, or even a fun hat.
/halloween-nails-monochrome-9c0cafd97fcb4d2e8be5622fcc43cee9.jpg)
Halloween is a time for creativity and expression, so let your nails be your canvas for a spooky and chic Halloween look that everyone will love!
💀 Spooky Chic: Halloween Nails That Won't Haunt Your Budget 💅
Halloween is just around the corner, and that means it's time to unleash your inner ghoul and get creative with your Halloween nails. But with all the spooky-themed nail art popping up everywhere, it can be easy to feel overwhelmed and think you need to spend a fortune to get the perfect look.
Fear not, fellow nail enthusiasts! This year, we're embracing budget-friendly Halloween nail designs that are both stylish and spooky. Whether you're a seasoned nail art pro or a beginner, these ideas will inspire you to create a look that's uniquely you, without breaking the bank.
1. Embrace the Classics with Simple Shapes and Colors:
The beauty of Halloween nail art lies in its simplicity. Sometimes, the most effective designs are the ones that focus on basic shapes and colors.
-
Black and Orange: This iconic Halloween color scheme is a timeless classic. Opt for a solid black base coat with a bright orange accent nail featuring a simple design like a spiderweb or a pumpkin silhouette.
-
White and Black: This contrasting color combination is perfect for creating minimalist, spooky designs. Paint your nails white and use black polish to create tiny ghosts, bats, or even a cute little tombstone.
-
Red and Black: For a more dramatic look, consider using a red base coat with black accents. A classic dripping blood effect, a single black spider, or a simple black dot design can add a touch of gothic charm.
2. DIY Nail Stickers: Easy and Affordable:
Nail stickers are a game-changer for anyone looking for easy and affordable Halloween nail art. They come in a wide variety of designs, from cute ghosts and bats to intricate spiderwebs and spooky pumpkins.
-
Choose your Theme: Do you want to go for cute and whimsical or dark and edgy? The choice is yours!
-
Apply with Precision: Ensure your nails are clean and dry before applying the stickers. Use tweezers to carefully place the stickers onto your nails, and gently press down to ensure they adhere well.
-
Seal with a Top Coat: A clear top coat will protect your stickers and make them last longer.
3. Stamping Your Way to Spooktacular Nails:
Nail stamping is a fun and versatile technique that allows you to create intricate designs with ease. You can create anything from intricate spiderwebs to delicate bat silhouettes using pre-designed plates or even create your own stencils.
-
Start with a Base Coat: Choose your base color and apply two coats for a smooth, even finish.
-
Scrape the Excess Polish: Use a scraper tool to remove excess polish from your stamping plate.
-
Transfer the Design: Press a stamper firmly onto the plate to pick up the design.
-
Stamp onto Your Nails: Gently roll the stamper over your nail to transfer the design.
4. The Power of Negative Space:
Negative space nail art is a trendy technique that involves leaving a portion of your nail bare, creating a contrasting effect.
- Simple Shapes: Use a tape or a stencil to create simple shapes like a crescent moon, a ghost silhouette, or a spiderweb.
- Classic Colors: Stick to classic Halloween colors like black, white, and orange for a striking and timeless look.
5. Embrace Your Inner Artist:
Don't be afraid to get creative with your Halloween nail art. If you're comfortable with freehand painting, use thin brushes to create detailed designs.
-
Practice Makes Perfect: Start with simple shapes and gradually work your way up to more complex designs.
-
Use Dotting Tools: Dotting tools are perfect for creating tiny dots, creating spots for eyes on your ghosts or making webs on your spiderweb designs.
-
Accessorize with Rhinestones: Add a touch of sparkle to your nails with tiny rhinestones.
Tips for Affordable Halloween Nail Art:
-
Shop Around: Compare prices at different stores and online retailers to find the best deals on nail polish, stickers, and other supplies.
-
Use What You Already Have: Don't be afraid to repurpose old nail polishes and other supplies you already have on hand.
-
DIY is Your Friend: Create your own nail art stencils using tape or even paper cutouts.
-
Take Advantage of Sales: Look for deals and discounts on nail art supplies, especially around Halloween.
Maintaining Your Spooky Chic Nails:
Once you've created your Halloween nail art, there are a few things you can do to make it last longer:
-
Apply a Top Coat: A clear top coat will seal your design and protect it from chipping. Reapply every few days for added protection.
-
Avoid Water and Soaking: Try to minimize the amount of time your nails are in water, as this can cause the polish to chip.
- Be Gentle: Avoid using your nails to open things or scratch things, as this can damage your nail art.
Halloween Nail Art Inspiration:
Here are some inspiring Halloween nail art ideas to get your creative juices flowing:
-
Spooky Spiderwebs: Black spiderwebs on a white or orange background.
-
Miniature Pumpkins: Tiny pumpkins painted on your nails with orange and green polish.
-
Cute Ghosts: White ghost silhouettes with black eyes and a black mouth on a black background.
-
Blood Dripping Nails: Red nail polish with a black dripping blood effect.
-
Bat Silhouettes: Black bat silhouettes on a white or black background.
-
Graveyard Nails: Black nails with tiny white tombstones and a black crescent moon.
-
Zombie Eyes: Black nail polish with a white eye and a bloody red pupil.
-
Skeleton Nails: White skeleton bones painted on a black background.
Conclusion:
Halloween nail art is a fun and creative way to express your spooky side, and it doesn't have to break the bank. With a little creativity and these budget-friendly tips, you can create a Halloween nail look that's both stylish and scary. So grab your nail polish and get ready to unleash your inner ghoul!
