
Summer French Tip Nails for Kids: Fun and Easy Designs
Summer French Tip Nails for Kids: Fun and Easy Designs
Summer is the time for bright colors, fun activities, and, of course, stylish nails. If you're looking for a way to give your child's nails a summery makeover, French tip nails are a great option. They're easy to do, they look great on all ages, and they're perfect for a variety of summer activities.

In this blog post, we'll show you how to create summer French tip nails for kids. We'll provide step-by-step instructions, as well as tips and tricks for making the process as easy and painless as possible.
What You'll Need
- Nail polish in a variety of colors
- A base coat
- A top coat
- A small brush
- A toothpick
- A bowl of water
- Cotton balls

Step 1: Prep Your Nails
The first step is to prep your child's nails. This means filing them into a desired shape, pushing back the cuticles, and applying a base coat.
Step 2: Paint the Base Color

Once your child's nails are prepped, you can start painting them. Choose a bright, summery color for the base coat. You can use a solid color, or you can create a gradient by using two or more colors.
Step 3: Add the French Tip
To create the French tip, you'll need to use a small brush to paint a thin line of white polish along the edge of the nail. You can make the line as thick or thin as you like.

Step 4: Add Details
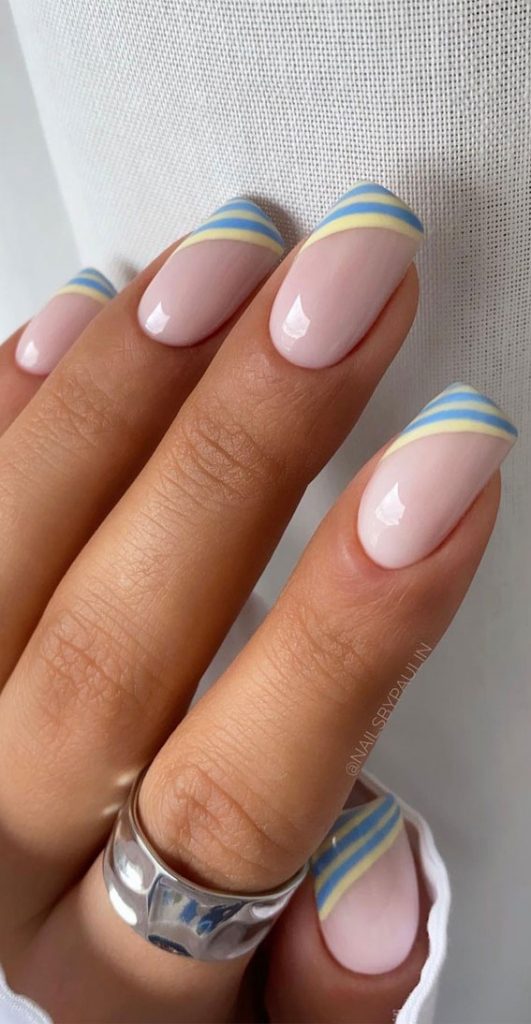
Once the French tip is dry, you can add some additional details to your child's nails. This could include adding dots, stripes, or flowers. You can also use glitter or nail stickers to create a more festive look.
Step 5: Seal the Deal

Once you're happy with your child's nails, you'll need to seal them with a top coat. This will help to protect the polish and keep it from chipping.
Tips and Tricks

Here are a few tips and tricks for creating summer French tip nails for kids:

- Use a light touch when painting the French tip. This will help to prevent the polish from getting too thick and clumpy.
- If you make a mistake, don't worry. You can easily fix it by using a toothpick to dab away the excess polish.
- Let each coat of polish dry completely before moving on to the next one. This will help to prevent the nails from smudging.
- If you're using glitter or nail stickers, apply them before you seal the nails with the top coat. This will help to keep them in place.
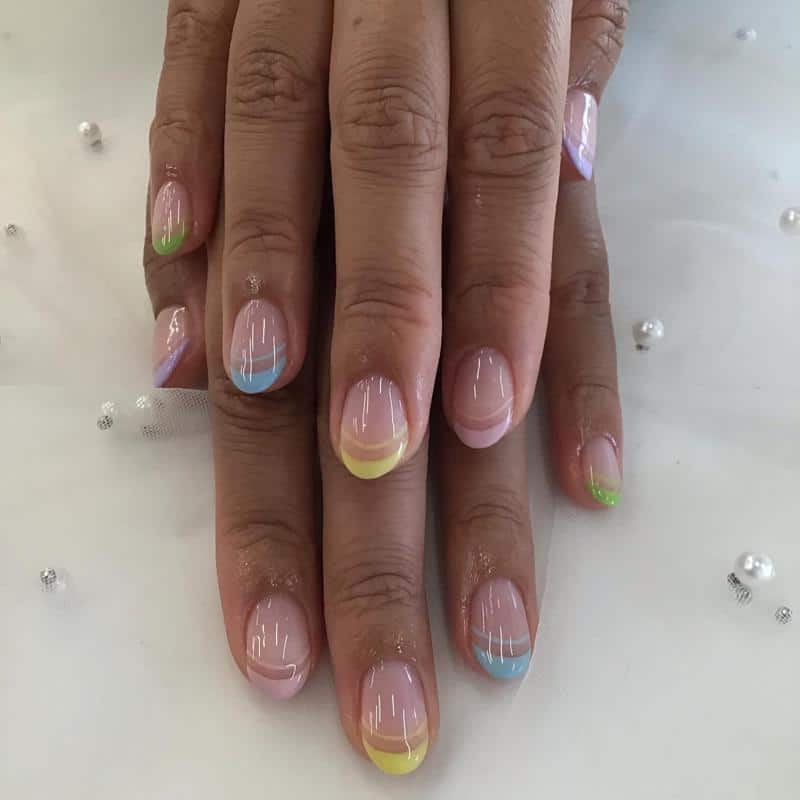
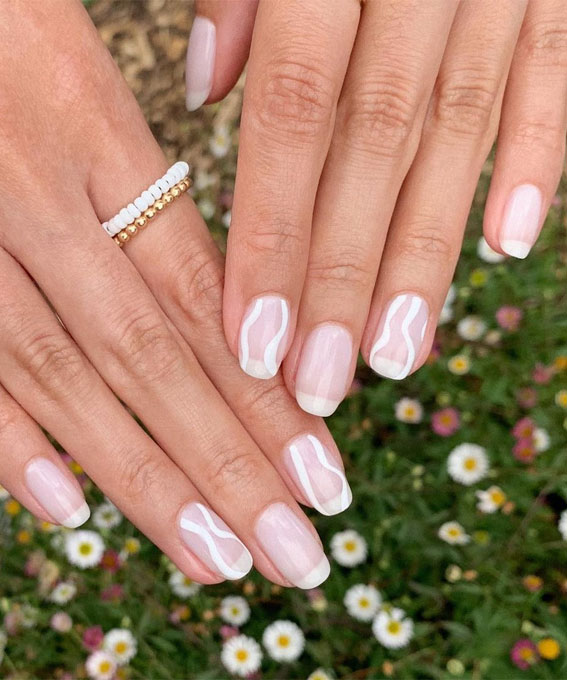
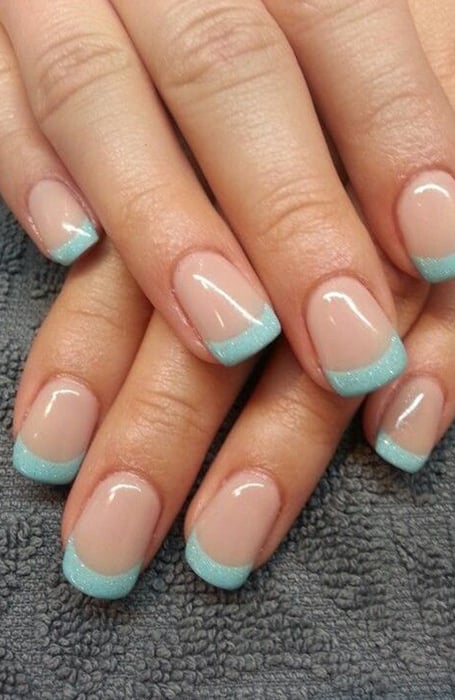
Summer French Tip Nail Designs

Here are a few summer French tip nail designs that you can try:
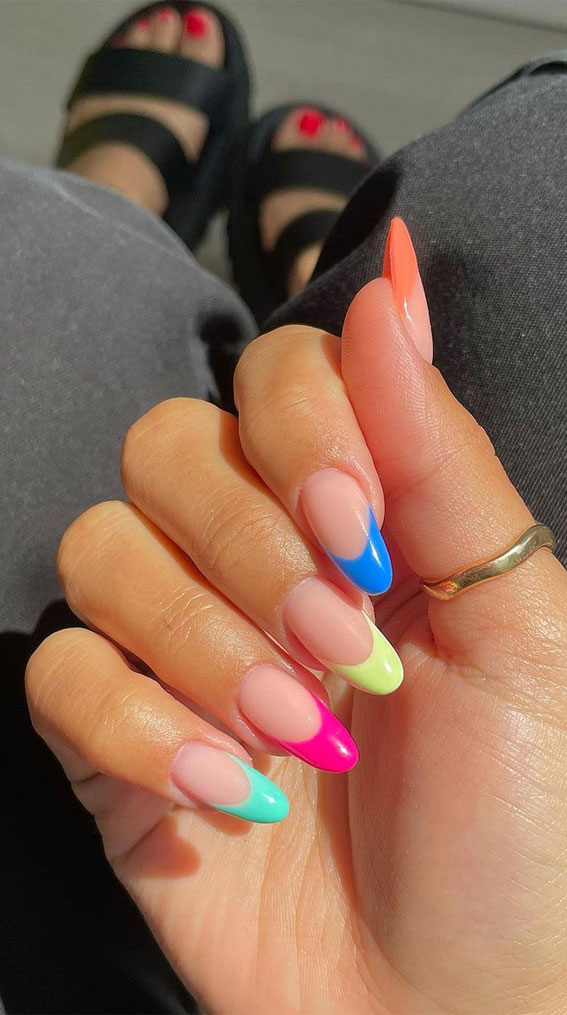

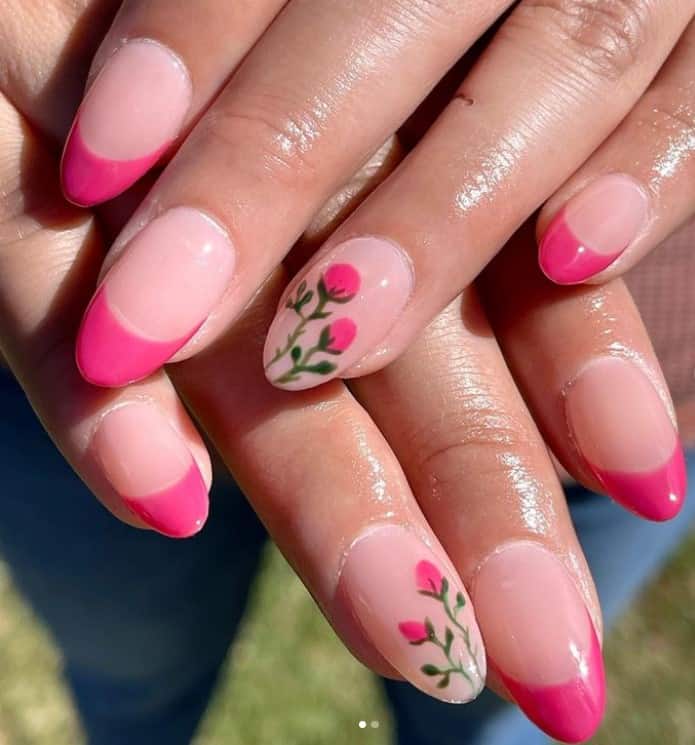
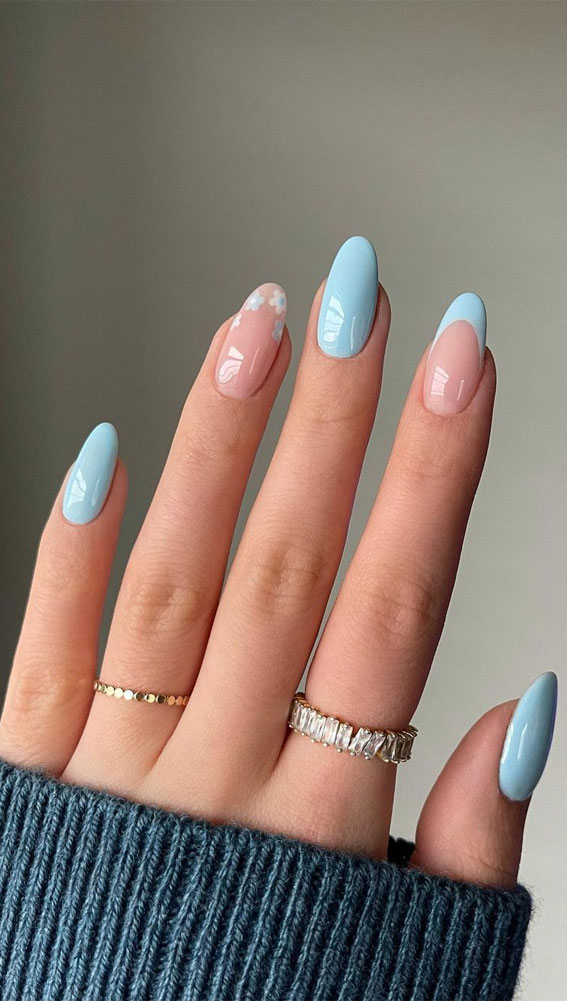
- Solid color French tips: This is a classic French tip design that is perfect for any occasion. Choose a bright, summery color for the base coat and a white French tip.
- Gradient French tips: This is a fun and trendy way to add some dimension to your child's nails. Start by painting the base coat in a light color. Then, use a sponge to apply a darker color to the tips of the nails.
- Dots and stripes French tips: This is a playful and easy-to-do design. Use a small dotting tool to add dots to the tips of the nails. You can also add stripes or other shapes.
- Floral French tips: This is a beautiful and feminine design. Use a nail art brush to paint flowers on the tips of the nails. You can use different colors and sizes of flowers to create a unique look.
- Glitter French tips: This is a fun and festive design that is perfect for a special occasion. Use glitter polish to create a French tip, or add glitter to the tips of the nails after you've applied the top coat.
No matter what design you choose, summer French tip nails are a great way to give your child's nails a stylish makeover. They're easy to do, they look great, and they're perfect for a variety of summer activities. So what are you waiting for? Get started today!

Keywords


- summer french tip nails
- kids
- fun
- easy
- designs
- bright colors
Summer French Tip Nails for Kids
Summer is the perfect time to let your kids' nails breathe and have some fun with nail art. French tip nails are a classic look that is easy to do and looks great on kids of all ages.
With just a few simple supplies, you can create a beautiful French manicure for your child that will last all summer long.
What You Need
To create French tip nails for kids, you will need the following supplies:
- Nail polish in white, pink, and red
- A small nail brush
- A toothpick
- A bowl of water
- A paper towel
- A pair of child-safe nail clippers
- A nail file
Step-by-step Instructions
- Start by cleaning your child's nails with a nail brush and warm water. Be sure to remove any old nail polish.
- File your child's nails into a desired shape.
- Apply a base coat to your child's nails. This will help to protect the nails and prevent the nail polish from chipping.
- Paint the tips of your child's nails with white nail polish. Allow the polish to dry completely.
- Dip a toothpick into the red nail polish and make a small dot on the tip of each nail.
- Use a small nail brush to blend the red polish into the white polish. This will create a gradual ombre effect.
- Allow the nail polish to dry completely.
- Apply a top coat to seal the polish and protect it from chipping.
Your child's French tip nails are now complete! They will love showing off their new summer manicure.
Tips for Creating French Tip Nails for Kids
- Use a light hand when applying the nail polish. This will help to prevent the polish from getting on your child's skin.
- If your child gets nail polish on their skin, you can easily remove it with a cotton ball dipped in nail polish remover.
- Be patient with your child. Creating French tip nails can take some time, so be prepared to give your child plenty of breaks.
- Have fun! French tip nails are a great way for your child to express their creativity. Let them choose the colors and designs that they want.
Variations on the Classic French Tip
Once you have mastered the classic French tip, you can start to experiment with different variations. Here are a few ideas:
- Use different colors for the tips of the nails.
- Add glitter or other embellishments to the tips of the nails.
- Create a reverse French tip by painting the tips of the nails a different color than the rest of the nail.
- Try a French tip with a twist, such as a zigzag French tip or a ombre French tip.
The possibilities are endless when it comes to French tip nails. Let your child's imagination run wild and create a unique look that they will love.

Fun and Easy Summer French Tip Nails for Kids
Summer is the perfect time to let your kids' nails breathe and have some fun with nail art. French tip nails are a classic look that is easy to do and looks great on kids of all ages.
With just a few simple supplies, you can create a beautiful French manicure for your child that will last all summer long.
Supplies:
- Nail polish in white, pink, and red
- A small nail brush
- A toothpick
- A bowl of water
- A paper towel
- A pair of child-safe nail clippers
- A nail file
Instructions:

- Start by cleaning your child's nails with a nail brush and warm water. Be sure to remove any old nail polish.
- File your child's nails into a desired shape.
- Apply a base coat to your child's nails. This will help to protect the nails and prevent the nail polish from chipping.
- Paint the tips of your child's nails with white nail polish. Allow the polish to dry completely.
- Dip a toothpick into the red nail polish and make a small dot on the tip of each nail.
- Use a small nail brush to blend the red polish into the white polish. This will create a gradual ombre effect.
- Allow the nail polish to dry completely.
- Apply a top coat to seal the polish and protect it from chipping.

Your child's French tip nails are now complete! They will love showing off their new summer manicure.
Tips for Creating French Tip Nails for Kids:
- Use a light hand when applying the nail polish. This will help to prevent the polish from getting on your child's skin.
