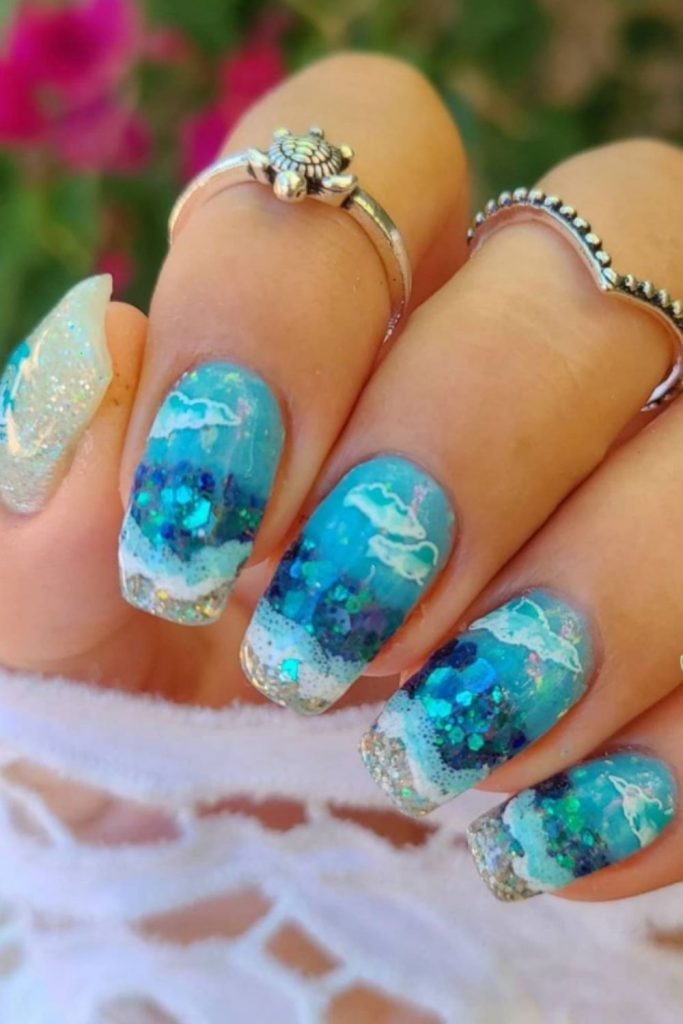
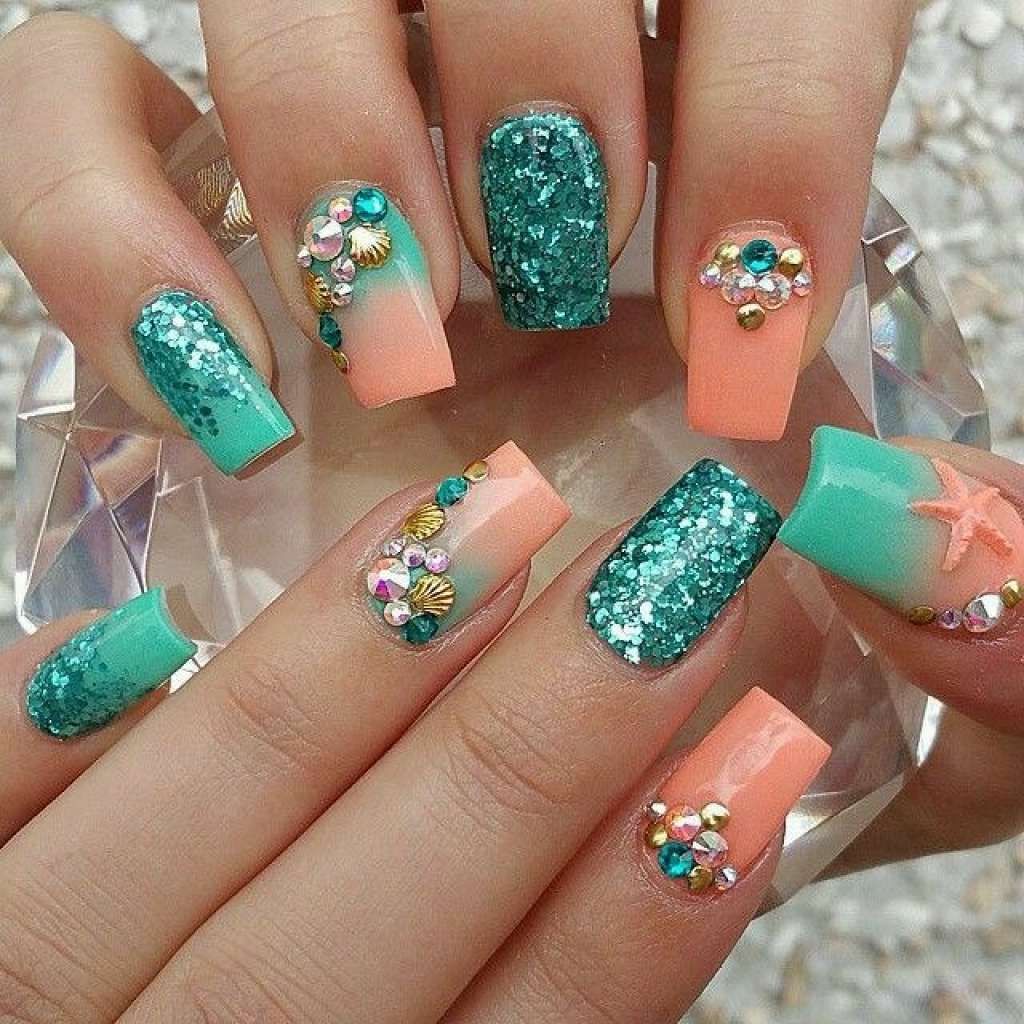
Nail Extensions That Will Make You Feel Like You're on the Beach

Nail Extensions That Will Make You Feel Like You're on the Beach


Introduction

Summer is the time to let loose and have some fun, and what better way to do that than with a beach-themed nail extension? Beach nails are all about bright colors, fun patterns, and a carefree attitude. Whether you're planning a beach vacation or just want to bring a little bit of the beach to your everyday life, beach nails are the perfect way to show your style.
Types of Beach Nails


There are endless possibilities when it comes to beach nails, but some of the most popular designs include:
- Sponged nails: This technique creates a textured, beachy look. To create this look, start by applying a base coat to your nails. Then, use a sponge to apply a sheer coat of white polish to your nails. While the white polish is still wet, use a sponge to dab on different colors of polish, creating a random, ombré effect.
- Marbled nails: This look is another great way to create a textured, beachy look. To create marbled nails, start by applying a base coat to your nails. Then, use a toothpick or skewer to swirl different colors of polish together on your nails.
- Shell nails: This look is perfect for a beachy manicure. To create shell nails, start by applying a base coat to your nails. Then, use a small paintbrush to paint small, white circles on your nails. Once the white circles are dry, use a black paintbrush to add dots in the center of each circle to create the illusion of shells.
- Tropical nails: This look is perfect for a summer vacation. To create tropical nails, start by applying a base coat to your nails. Then, use a small paintbrush to paint different tropical fruits, flowers, or leaves on your nails.
- Neon nails: This look is perfect for a fun, summery mani. To create neon nails, start by applying a base coat to your nails. Then, use a bright, neon polish to paint your nails.
Tips for Applying Beach Nails


When applying beach nails, there are a few things you can keep in mind to help you achieve the best results:

- Start with a clean, dry nail bed. This will help the polish to adhere better and prevent it from chipping.
- Use a thin layer of polish. This will help to prevent the polish from becoming thick and clumpy.
- Apply each coat of polish in thin layers. This will help to prevent the polish from bubbling or running.
- Let each coat of polish dry completely before applying the next coat. This will help to prevent the polish from chipping.
- Use a top coat to seal in the polish. This will help to protect the polish and extend the life of your manicure.
How to Care for Beach Nails


To keep your beach nails looking their best, there are a few things you can do:

- Wash your hands regularly. This will help to remove dirt, oil, and bacteria from your nails, which can damage the polish.
- Moisturize your hands and nails. This will help to keep your nails healthy and strong.
- Avoid using harsh chemicals on your nails. This can dry out your nails and damage the polish.
- Don't pick or bite your nails. This can damage the nails and make them more prone to infection.
Conclusion

:max_bytes(150000):strip_icc():format(webp)/SeaFoamSwirl-66cdc5fa68cf494ea5c22d8225bb944f-d1aaf3a894134bc4bb18306d468103c7.jpg)
Beach nails are a fun and easy way to add a touch of summer to your look. With so many different designs to choose from, you're sure to find the perfect beach nails to match your personality and style. So what are you waiting for? Get ready for summer with a beach-themed nail extension!


3 Ways to Get Beach Nails Extension That Last
Summer is the time for beach days, pool parties, and long days spent in the sun. And what better way to show off your summer style than with a set of beach nails?


Beach nails are all about fun and flirty colors, designs, and embellishments. But if you want your beach nails to last, you need to make sure you take care of them.
Here are three tips for getting beach nails extension that last:

- Start with a good base. The foundation of your beach nails is the nail bed. If your nails are weak or damaged, they won't be able to support the weight of the extension. Make sure to keep your nails hydrated and healthy by using a good cuticle oil and moisturizer.
- Choose the right extension material. There are a variety of different materials available for beach nails extension, including acrylic, gel, and silk. The best material for you will depend on your individual needs and preferences. Acrylic nails are the most durable, but they can be difficult to remove. Gel nails are a good option for those who want a natural look, and they're easier to remove than acrylic nails. Silk nails are a lightweight option that's perfect for those with thin or weak nails.
- Apply the extension properly. When applying your beach nails extension, it's important to follow the directions carefully. This will help ensure that the extensions stay in place and that your nails don't get damaged.


Once you've applied your beach nails extension, you'll need to take care of them to make sure they last. Here are a few tips:
- Avoid soaking your nails in water for long periods of time. This can loosen the adhesive and cause the extensions to fall off.
- Don't use your nails as tools. This can damage the extensions and your natural nails.
- Be gentle when removing your nail polish. Using harsh removers or scraping your nails can damage the extensions.
- Get regular touch-ups. This will help keep your beach nails looking their best.

With a little care, your beach nails extension can last for weeks or even months. So go ahead and enjoy your summer without having to worry about your nails.


Headlines:
- How to Get Beach Nails Extension That Last
- The Best Materials for Beach Nails Extension
- How to Apply Beach Nails Extension Properly
- How to Take Care of Beach Nails Extension

Positive/Poetic Words:
:max_bytes(150000):strip_icc():format(webp)/SeaFoamSwirl-66cdc5fa68cf494ea5c22d8225bb944f-d1aaf3a894134bc4bb18306d468103c7.jpg)

- Flirty
- Effortless
- Summertime
- Glamour
- Sophistication.
