How to Add a 3D Ribbon to Your Pink Nails
How to Add a 3D Ribbon to Your Pink Nails
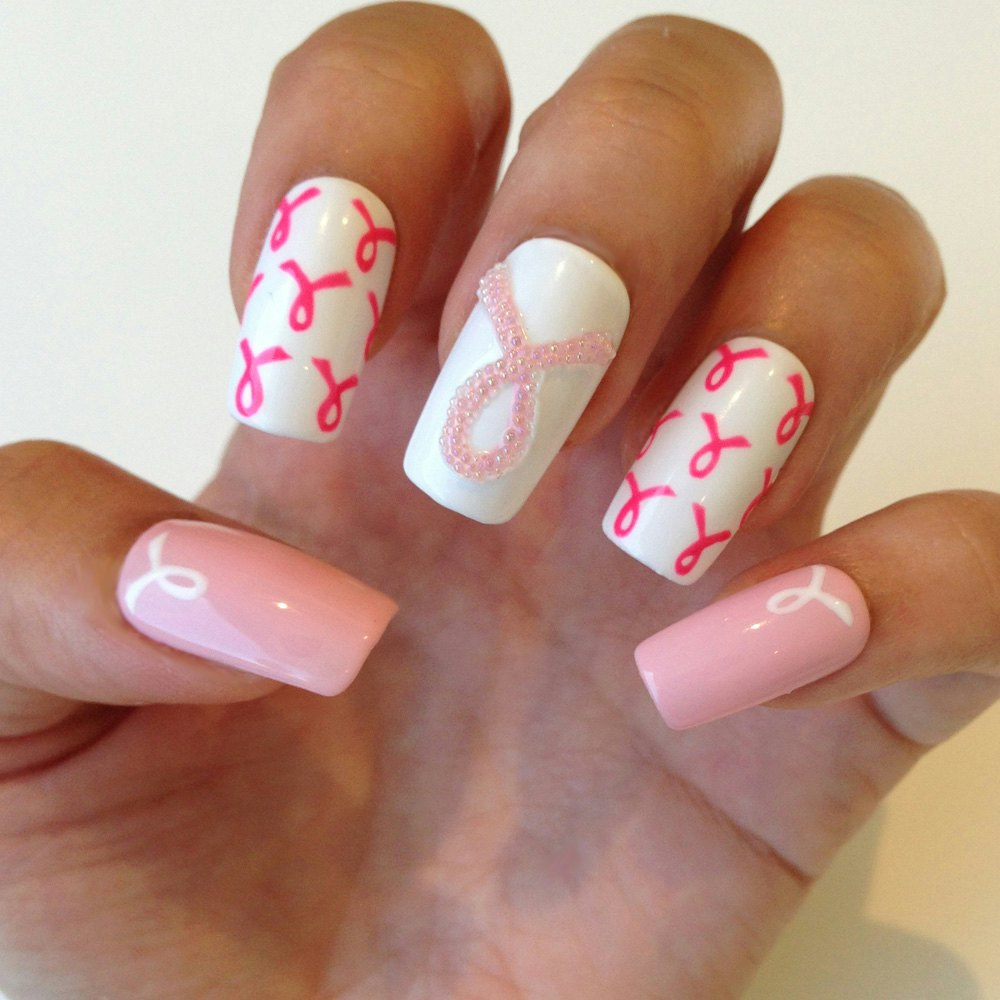
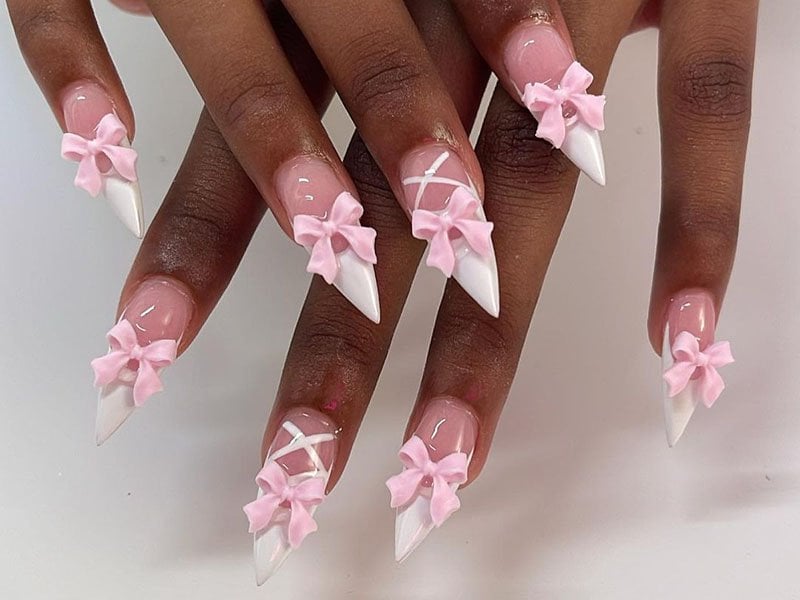
Pink nails with a 3D ribbon are a fun and stylish way to add a touch of personality to your look. This nail art design is easy to achieve at home, and it's perfect for any occasion.
In this tutorial, I will show you how to create this eye-catching nail art design. I'll walk you through each step of the process, from preparing your nails to applying the 3D ribbon. So if you're ready to get started, let's get started!
Supplies

- Base coat
- Pink nail polish
- White nail polish
- 3D ribbon
- Top coat
- Nail file
- Cuticle pusher
- Orangewood stick
Step 1: Prep your nails
Before you begin, you'll need to prep your nails. This means removing any old nail polish, filing your nails into your desired shape, and pushing back your cuticles.

Once your nails are prepped, apply a base coat to protect your nails from the polish.
Step 2: Apply the pink nail polish
Next, apply two coats of pink nail polish to your nails. Be sure to let each coat dry completely before applying the next one.

Step 3: Add the white details
Once your nails are dry, use a thin nail art brush to add white details to your nails. You can do this by drawing lines, dots, or squiggles. Be creative and have fun with it!
Step 4: Apply the 3D ribbon

Now it's time to add the 3D ribbon. Cut a piece of ribbon that is about 1 inch long. Then, use a pair of tweezers to place the ribbon on your nail. You can place the ribbon in the center of your nail, or you can place it off-center for a more asymmetrical look.
Once the ribbon is in place, use a clear top coat to secure it in place.
Step 5: Finish with a top coat

Finally, apply a top coat to your nails to seal in the design. This will help to protect your nails from chipping and will also give them a shiny finish.
And that's it! You've now created your very own 3D ribbon nail art design.
Here are a few tips to help you achieve the best results:
- Use a thin nail art brush to apply the white details. This will help you to create a more precise and controlled line.
- Be careful not to apply too much pressure when applying the 3D ribbon. This could cause the ribbon to wrinkle or crease.
- Use a quick-drying top coat to seal in the design. This will help to prevent the ribbon from lifting or peeling.
With a little practice, you'll be able to create beautiful 3D ribbon nail art designs in no time. So what are you waiting for? Get started today!
Frequently Asked Questions

Q: What kind of ribbon can I use for this nail art design?
A: You can use any type of ribbon that you like. However, I recommend using a thin ribbon that is easy to work with. Some good options include grosgrain ribbon, satin ribbon, and organza ribbon.
Q: How do I attach the ribbon to my nails?

A: You can attach the ribbon to your nails using a few different methods. One option is to use a small amount of clear nail glue. Another option is to use a double-sided adhesive tape.

Q: How do I prevent the ribbon from lifting or peeling?
A: To prevent the ribbon from lifting or peeling, you can use a quick-drying top coat. This will help to seal in the design and protect the ribbon from damage.


Q: Can I wear this nail art design for a long period of time?

A: Yes, you can wear this nail art design for a long period of time. However, you may need to reapply the top coat every few days to keep the design looking its best.
Conclusion


Pink nails with a 3D ribbon are a fun and stylish way to add a touch of personality to your look. This nail art design is easy to achieve at home, and it's perfect for any occasion. So what are you waiting for? Get started today!
Pink Nails with 3D Ribbons
Introduction
Pink nails are a classic choice for a reason. They're elegant, feminine, and flattering on all skin tones. But if you're looking for a way to add a little something extra to your pink nails, 3D ribbons are the perfect way to do it.
3D ribbons are a fun and easy way to add a touch of personality and pizzazz to your nails. They come in a variety of colors, shapes, and sizes, so you can find the perfect ribbon to complement your nail shape and desired look.
In this blog post, we'll show you how to add 3D ribbons to your pink nails in a few simple steps. We'll also provide tips on how to choose the right ribbons for your nails and how to apply them for a salon-quality manicure.


Step-by-Step Instructions
- Prepare your nails by pushing back your cuticles and applying a base coat.
- Paint your nails with two coats of your favorite pink nail polish.
- Once your nails are dry, choose the 3D ribbons you want to use. You can use one ribbon per nail, or you can overlap several ribbons to create a more dramatic look.
- Apply a small amount of nail glue to the back of the ribbon and press it onto your nail.
- Use a small brush to apply a coat of clear top coat over the ribbon.
- Allow the top coat to dry completely.

Tips for Choosing 3D Ribbons


When choosing 3D ribbons for your pink nails, there are a few things to keep in mind.
- The size of the ribbon. The size of the ribbon will depend on the size of your nails. If you have small nails, you'll want to choose a smaller ribbon. If you have large nails, you can choose a larger ribbon.
- The shape of the ribbon. The shape of the ribbon can also affect the overall look of your nails. A curved ribbon will create a more feminine look, while a straight ribbon will create a more modern look.
- The color of the ribbon. The color of the ribbon should complement the color of your nail polish. If you're wearing a bright pink nail polish, you can choose a ribbon in a contrasting color, such as black or white. If you're wearing a more muted pink nail polish, you can choose a ribbon in a similar color.

Tips for Applying 3D Ribbons

Applying 3D ribbons to your nails is easy, but there are a few things you can do to ensure that they look their best.
- Use a small amount of nail glue. Too much nail glue can cause the ribbon to become sticky and difficult to work with.
- Press the ribbon firmly onto your nail. This will help to ensure that the ribbon stays in place.
- Use a small brush to apply the clear top coat. This will help to protect the ribbon and keep it from chipping.

Troubleshooting


If you're having trouble applying 3D ribbons to your nails, there are a few things you can do to troubleshoot the problem.
- Make sure your nails are clean and dry. This will help the nail glue to adhere to the nail.
- Use a thin layer of nail glue. Too much nail glue can cause the ribbon to become sticky and difficult to work with.
- Press the ribbon firmly onto your nail. This will help to ensure that the ribbon stays in place.
- Use a small brush to apply the clear top coat. This will help to protect the ribbon and keep it from chipping.

Conclusion


Adding 3D ribbons to your pink nails is a great way to add a touch of elegance and personality to your look. With so many different colors, shapes, and sizes to choose from, you're sure to find the perfect ribbons to complement your nails and your style.
